Installing a door closer requires patience and attention to detail, following a manual with
- step-by-step
instructions is essential for success always.
Purchasing and Preparing for Installation
To begin the installation process, it is necessary to purchase a door closer, which can be found online or at local hardware stores, and then prepare the workspace.
The door closer should be chosen based on the type of door and its intended use, with consideration of factors such as size and weight.
A list of required tools should be gathered, including a screwdriver, drill, and measuring tape, to ensure a smooth installation process.
Additionally, the area around the door should be cleared of any obstacles or debris to provide a safe and efficient working environment.
By taking the time to properly prepare for the installation, the process can be completed quickly and effectively, resulting in a well-functioning door closer.
It is also important to read and understand the installation manual before starting the process.
Removing the Old Door Closer
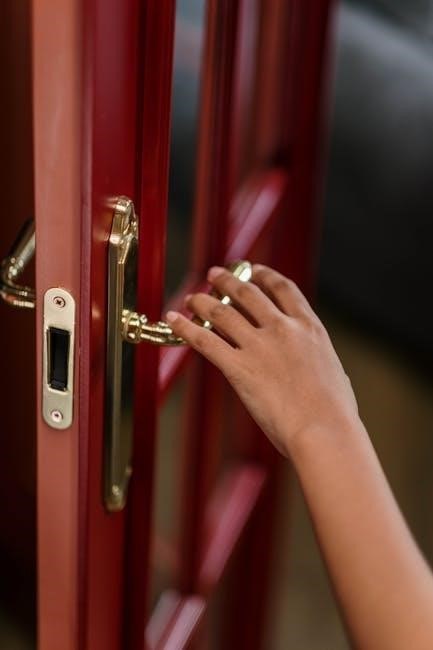
The first step in installing a new door closer is to remove the old one, which can be done by unscrewing and detaching it from the door and frame.
This process requires care to avoid damaging the surrounding area or the door itself.
It is necessary to disconnect the old door closer from any power sources or hinges before attempting to remove it.
A screwdriver is typically used to remove the screws that hold the old door closer in place.
Once the screws are removed, the old door closer can be gently pulled away from the door and frame, taking note of any wiring or connections that may need to be removed.
The area should then be cleaned and prepared for the installation of the new door closer, ensuring a smooth and efficient process. Proper removal is essential for a successful installation.

Installation Process
Installation involves securing the door closer with screws and testing its function to ensure proper operation always using a manual.
Securing the New Door Closer
To secure the new door closer, start by attaching it to the door frame using the provided screws and ensure they are tightened properly for maximum support.
The door closer should be aligned with the door frame to ensure proper functioning and to prevent any damage to the door or the surrounding area.
Using a level tool can help achieve the perfect alignment and make the installation process smoother and more efficient.
It is also important to refer to the manufacturer’s instructions for specific guidance on securing the door closer, as different models may have unique requirements.
By following these steps, the door closer can be securely installed and ready for testing, providing a safe and functional operating mechanism for the door.
The installation process requires attention to detail and patience to ensure a successful outcome.
Testing the Door Closer
Testing the door closer is a crucial step in the installation process, ensuring it functions correctly and provides the desired level of support.
The door should be opened and closed several times to test the closer’s performance, checking for smooth operation and proper alignment.
A
- list
of possible issues to check for includes uneven closing, loud noises, or excessive force required to open the door.
If any problems are encountered, refer to the troubleshooting guide for solutions or adjust the door closer as needed.
The testing process should be repeated after any adjustments are made to ensure the door closer is working properly and providing the desired level of support and functionality.
By thoroughly testing the door closer, users can ensure a safe and reliable operating mechanism for their door. Proper testing is essential for a successful installation.

Types of Door Closers and Installation Methods
Various door closers exist, including
- regular
arm types, requiring different installation methods always.
Regular Arm Installation Method
The regular arm installation method is a common technique used for door closer installation, it involves attaching the closer to the door frame and the door itself. This method is suitable for most types of doors, including interior and exterior doors. The installation process typically starts with mounting the closer to the door frame, then attaching the arm to the door. The arm is usually connected to the closer using a forearm screw, which needs to be tightened securely. The regular arm installation method is considered to be a straightforward process, but it requires attention to detail to ensure proper functioning of the door closer. A template is often provided with the door closer to help with the installation process, making it easier to achieve accurate results. The method is widely used due to its simplicity and effectiveness.
Optional Back Check and Closer Installation
The optional back check and closer installation is an additional feature that can be installed on the door to provide extra control over the door’s movement. This feature is usually installed on the pull/hinge side of the door and is designed to prevent the door from opening too widely. The back check closer is typically installed in conjunction with the regular arm installation method, and it requires careful adjustment to ensure proper functioning. The installation process involves attaching the back check closer to the door frame and adjusting the arm to the correct position. A template is often provided to help with the installation process, and it is essential to follow the manufacturer’s instructions carefully to achieve accurate results and ensure the door closer functions correctly. The back check closer provides an additional layer of control and safety.
Step-by-Step Installation Instructions
Follow these instructions carefully using a
- list
to ensure successful door closer installation always.
Preparing the Workspace and Tools
To start the installation process, it is essential to prepare the workspace and gather all the necessary tools. This includes a drill, screwdriver, and measuring tape.
A clean and clutter-free workspace is crucial to ensure a smooth installation process.
Clear off shelves and counters nearby to prevent damage from dust and debris.
Using a
- list
to keep track of the tools and materials needed can be helpful.
Make sure to have plenty of working space to move around comfortably.
Dust will undoubtedly fall during the installation, so it is a good idea to cover any nearby furniture or flooring.
By taking the time to prepare the workspace and tools, you can ensure a successful and stress-free installation experience.
Proper preparation is key to a successful door closer installation, and it is worth taking the time to get it right.
Installing the Main Arm and Connecting Rod
Installing the main arm and connecting rod is a critical step in the door closer installation process.
The main arm should be attached to the door frame using screws, ensuring a secure fit.
The connecting rod should be slid into the forearm of the main arm, and then rotated to the correct position.
Using a
- step-by-step
guide can help to ensure that this process is completed correctly.
It is essential to follow the manufacturer’s instructions for this step, as the process may vary depending on the type of door closer being installed.
The main arm and connecting rod should be tightened securely to prevent any movement or looseness.
Proper installation of these components is crucial for the door closer to function correctly.
By following the instructions carefully, you can ensure a successful installation and a properly functioning door closer.

Final Adjustments and Completion
Final checks and adjustments ensure proper door closer function and completion of installation process always successfully.
Adjusting the Door Closer
Adjusting the door closer is a crucial step in the installation process, it requires patience and attention to detail. The door closer must be adjusted to ensure proper function and to prevent damage to the door or frame. According to the installation manual, the adjusting process involves tweaking the closer’s arm and screw to achieve the perfect balance. This can be done by loosening or tightening the screw, depending on the door’s weight and size. The manual also provides troubleshooting tips in case the door closer is not functioning properly. By following the adjustment instructions carefully, you can ensure a smooth and quiet door operation. The adjustment process may vary depending on the type of door closer and the manufacturer’s instructions. It is essential to refer to the manual for specific guidance on adjusting the door closer.
Installing the Cover and Completing the Installation
Installing the cover is the final step in the door closer installation process, it provides a neat and tidy finish. The cover is usually attached with screws or clips, and it helps to conceal the door closer’s internal mechanisms. According to the manual, the cover should be aligned properly with the door frame to ensure a secure fit. Once the cover is installed, the door closer is complete and ready for use. The manual also recommends testing the door closer again to ensure it is functioning correctly. By following the installation instructions carefully, you can complete the installation successfully. The finished installation should be checked for any signs of damage or wear, and any necessary adjustments should be made. The door closer is now ready for normal use, providing smooth and quiet door operation.